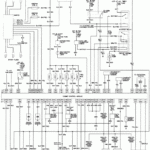
1996 Toyota 4runner Stereo Wiring Diagram – If you’re thinking about putting one in your vehicle, knowing your car stereo’s wiring diagram might be quite helpful. You will see the location where the cabling are situated and their work from the diagram. Moreover, the essay will handle coloration coding, which wiring go with certain parts, and how to use a new car mp3.
coded hues
Diverse colour regulations are used in Toyota stereo cabling diagrams to demonstrate which cable is which. This helps with fixing and identifying a number of auto problems. While many main wires are works with very low voltage, the orange wire does effectively with higher voltage electrical power. So that you can guarantee that your kitchen appliances work effectively, it’s crucial to keep your electrical wiring harness’s shade rule. Cables in Toyota vehicles can split, which is a typical difficulty. The wiring utilize could be completely replaced or these wire connections might be repaired.
Understanding the numerous color regulations is the first step in taking care of a Toyota fm radio electrical wiring schematic. Distinct wires have various uses and necessitate numerous voltages. Brownish cable connections, as an example, are usually ground planet collections. Dark brown wire connections, however, are often considered to be stay wire connections in autos.
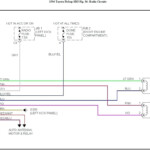
Based on the kind of the car, the cable colours over a Toyota radio station cabling schematic can change. The 12V electricity is in the yellowish wires. Accessories connect with red-colored cords. As well as for lighting, there are actually orange wires with bright white stripes. In addition shade-coded are lecturer wire connections. To the left entrance speaker, white colored wires are affixed. On the right rear speaker, purple cables are affixed. The remaining back end loudspeaker is attached by eco-friendly wires.
Position of wire connections
You must be aware of the location of the cables in order to install your new audio. Your automobile has a number of wires, which includes floor cables, audio speakers, and strength outlines. You must comprehend the stereo wiring diagram in order to determine where each wire should be located. You are able to look at an installment video clip to see the color and phase from the wire connections on the car, that will help you realize it much better.
You have to initially figure out the transform-on wire (also referred to as distant cable). As soon as the stereo is powered on, the amplifier is expected to turn on through this blue and bright white cable. Associated with the stereo, it is actually situated. To get in touch this cable, you must initially go ahead and take radio station out from the picture. You should adhere to the manufacturer’s recommendations if your stereo is aftermarket. As soon as you’ve identified the turn-on wire, use a soldering metal or Posi-Connector to link it on the other wires.
On a cabling diagram to get a Toyota stereo system, also you can search for the positioning of the cords. Disconnecting the pinnacle system and also the back again wires is required to install a stereo within a Toyota Corolla. After that, identify the wires that get connected to the speaker systems. The hue of the cables must be shown on their own brands. You might recognize the wire connections that connect with the energy provide, floor supply, and speaker systems in this particular technique.
the objective of cords
In order to diagnose your car’s electrical system, you must be able to read a Toyota radio wiring diagram. It is possible to rapidly and accurately identify complications with its guidance. Live cables are frequently dark brown, although neutral wires may be glowing blue or reddish. But the hue of these wire connections is different from united states to united states.

The goal of each wire is suggested by its coloration on a stereo cabling diagram. As an illustration, reddish colored backlinks on the reddish wire in a vehicle and denotes the ability source. The soil cable, which happens to be black color, is linked to exposed aluminum in the motor vehicle. Other cabling indicate just how the audio speakers work. They identify the spot of each presenter and can be bought in sound or striped types.
For your several electric powered functions from the automobile, Toyota automobiles demand many wire hues. All DC links use the reddish wire, the good strength cord. The tool solar panel wires control often provides the glowing blue wire, which is useful for reduced voltage signs. In a few cars, the black cable, which usually links in a negative way for the DC supply, can work as our planet ground.
getting in a car stereo
In order to install a new car stereo, you must understand how to connect your new audio. The wires utilize that may be included in the stereo could be used to get connected to the vehicle’s power source. The stereo system should also be connected to the car’s soil cable, which happens to be frequently black colored. You should be cautious because a sloppy connection can result in subpar audio quality, when connecting this cable.
Prior to installing a whole new music, you want choose the right electrical wiring funnel for the car. Stick to the wires diagram and make certain that all the wire connections are coloured appropriately. A installation set that is included with installation suggestions can also be offered. These kits will come with mounting tabs along with a aluminum housing sleeve.
The components’ cables need to then be hooked up. Be sure every one of the wiring are linked properly, and any knobs or storage need to be replaced. For your stereo system to operate correctly, you need two amplified loudspeakers. Look into the stereo’s performance following you’re accomplished. Some retailers even supply free stereo system installation.
Gallery of 1996 Toyota 4runner Stereo Wiring Diagram